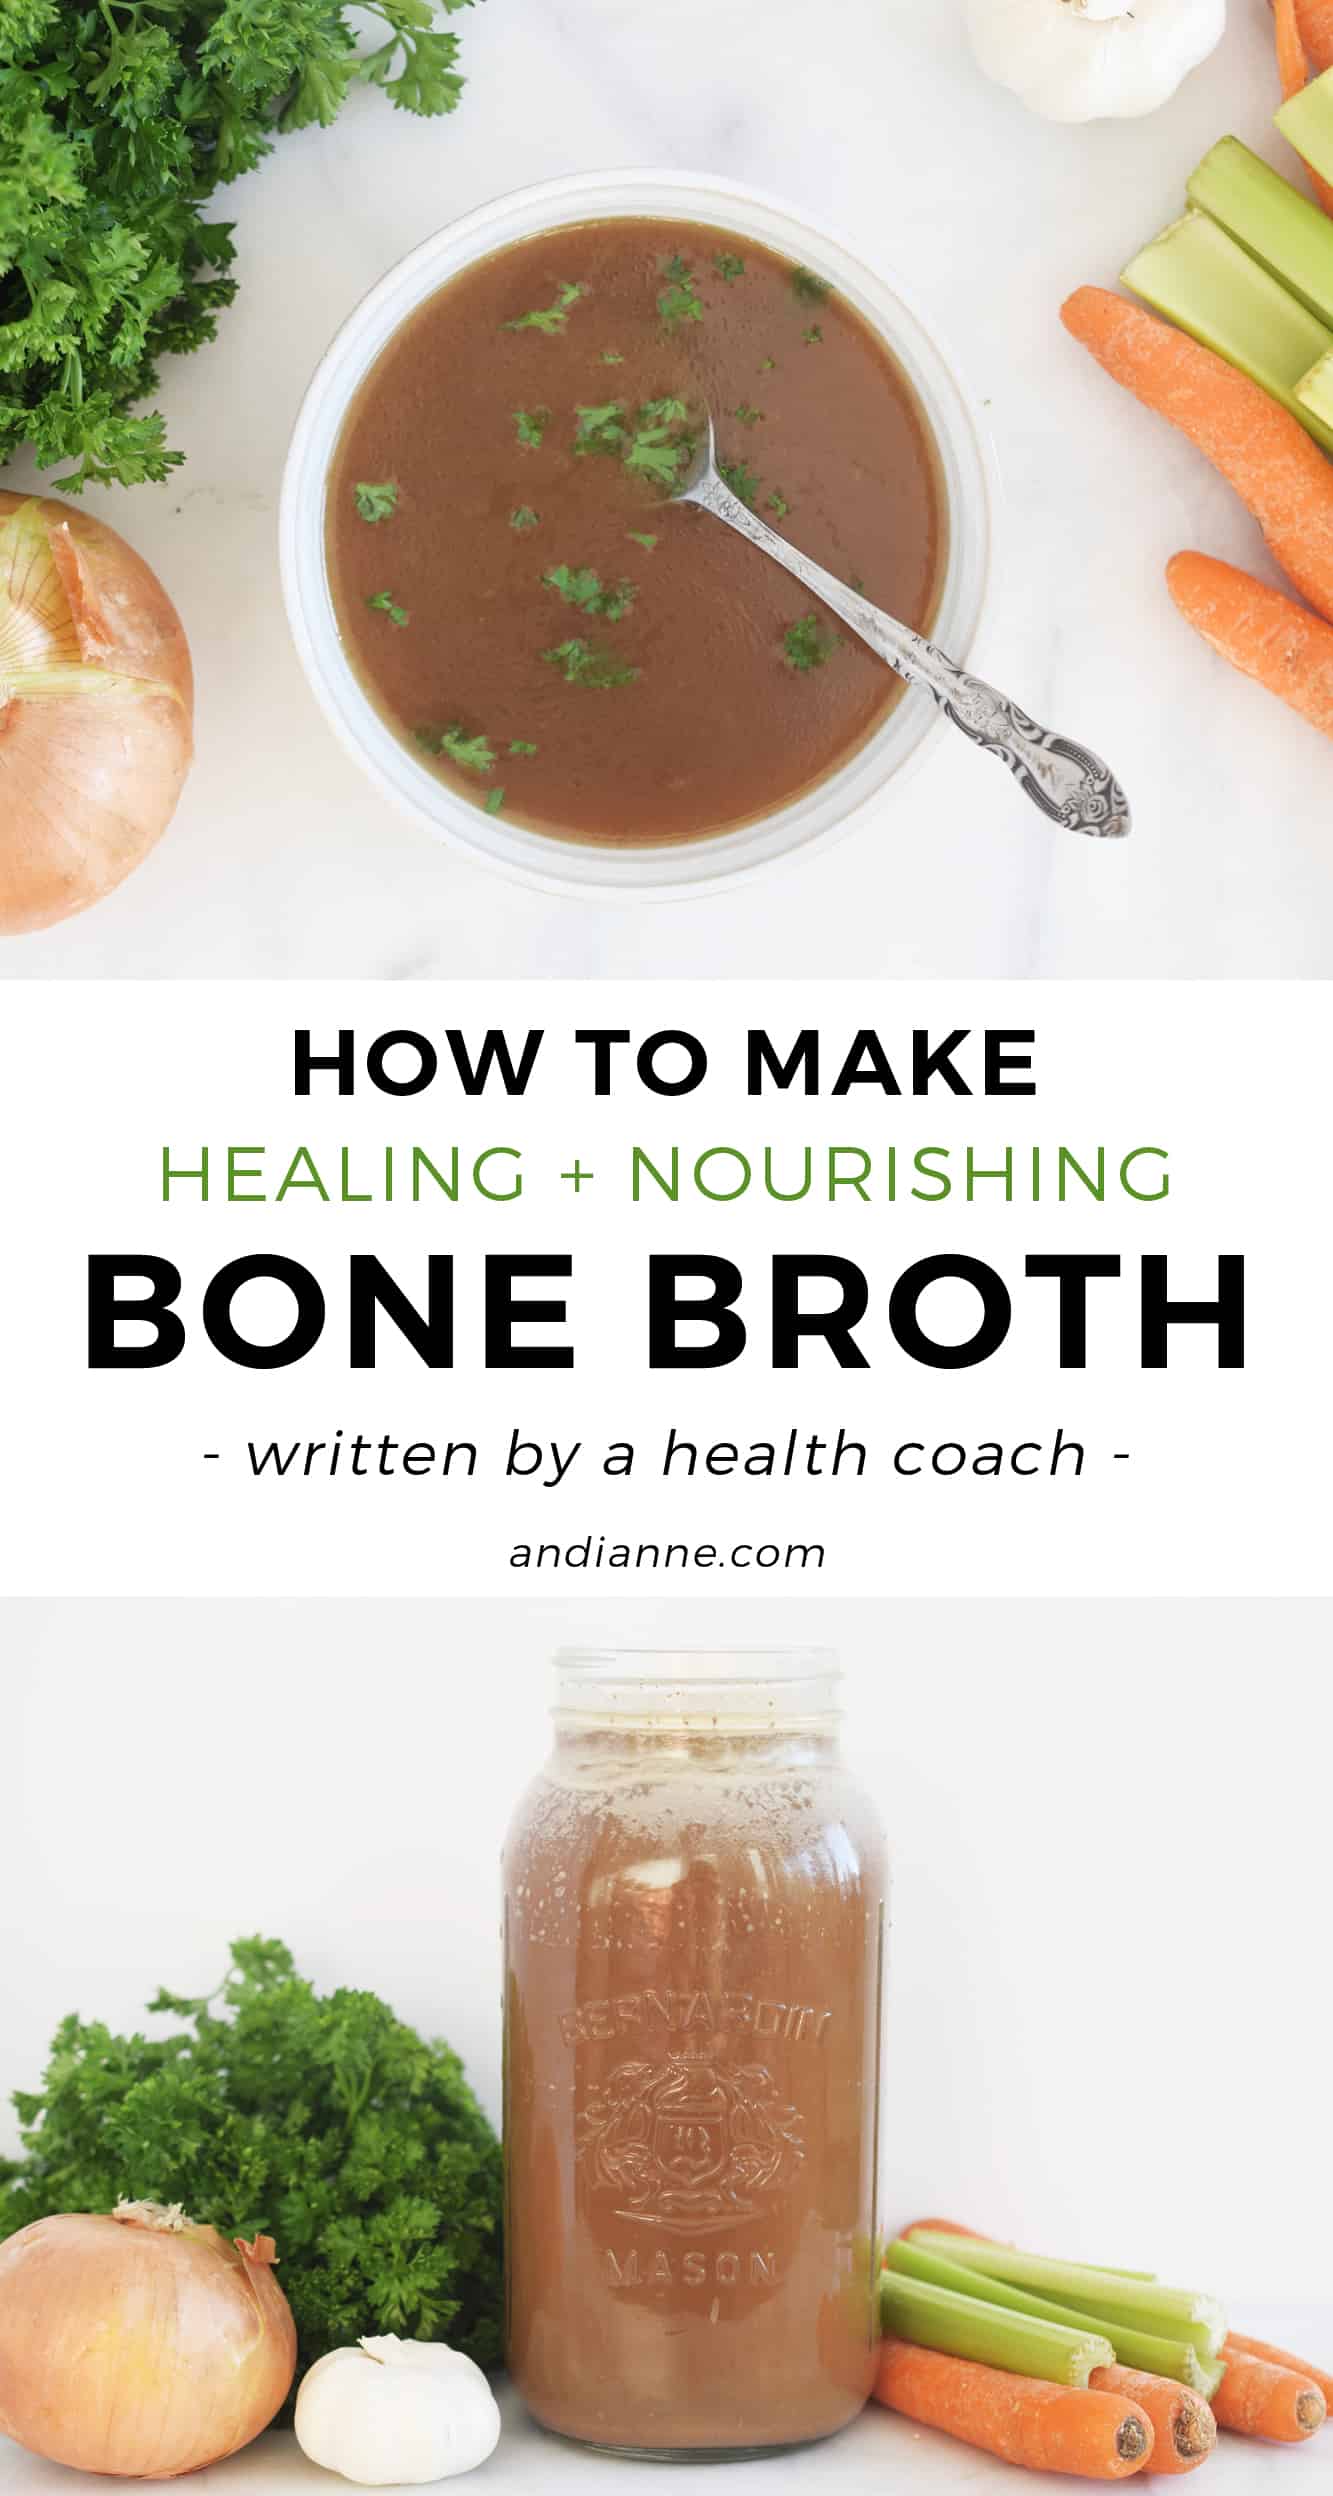
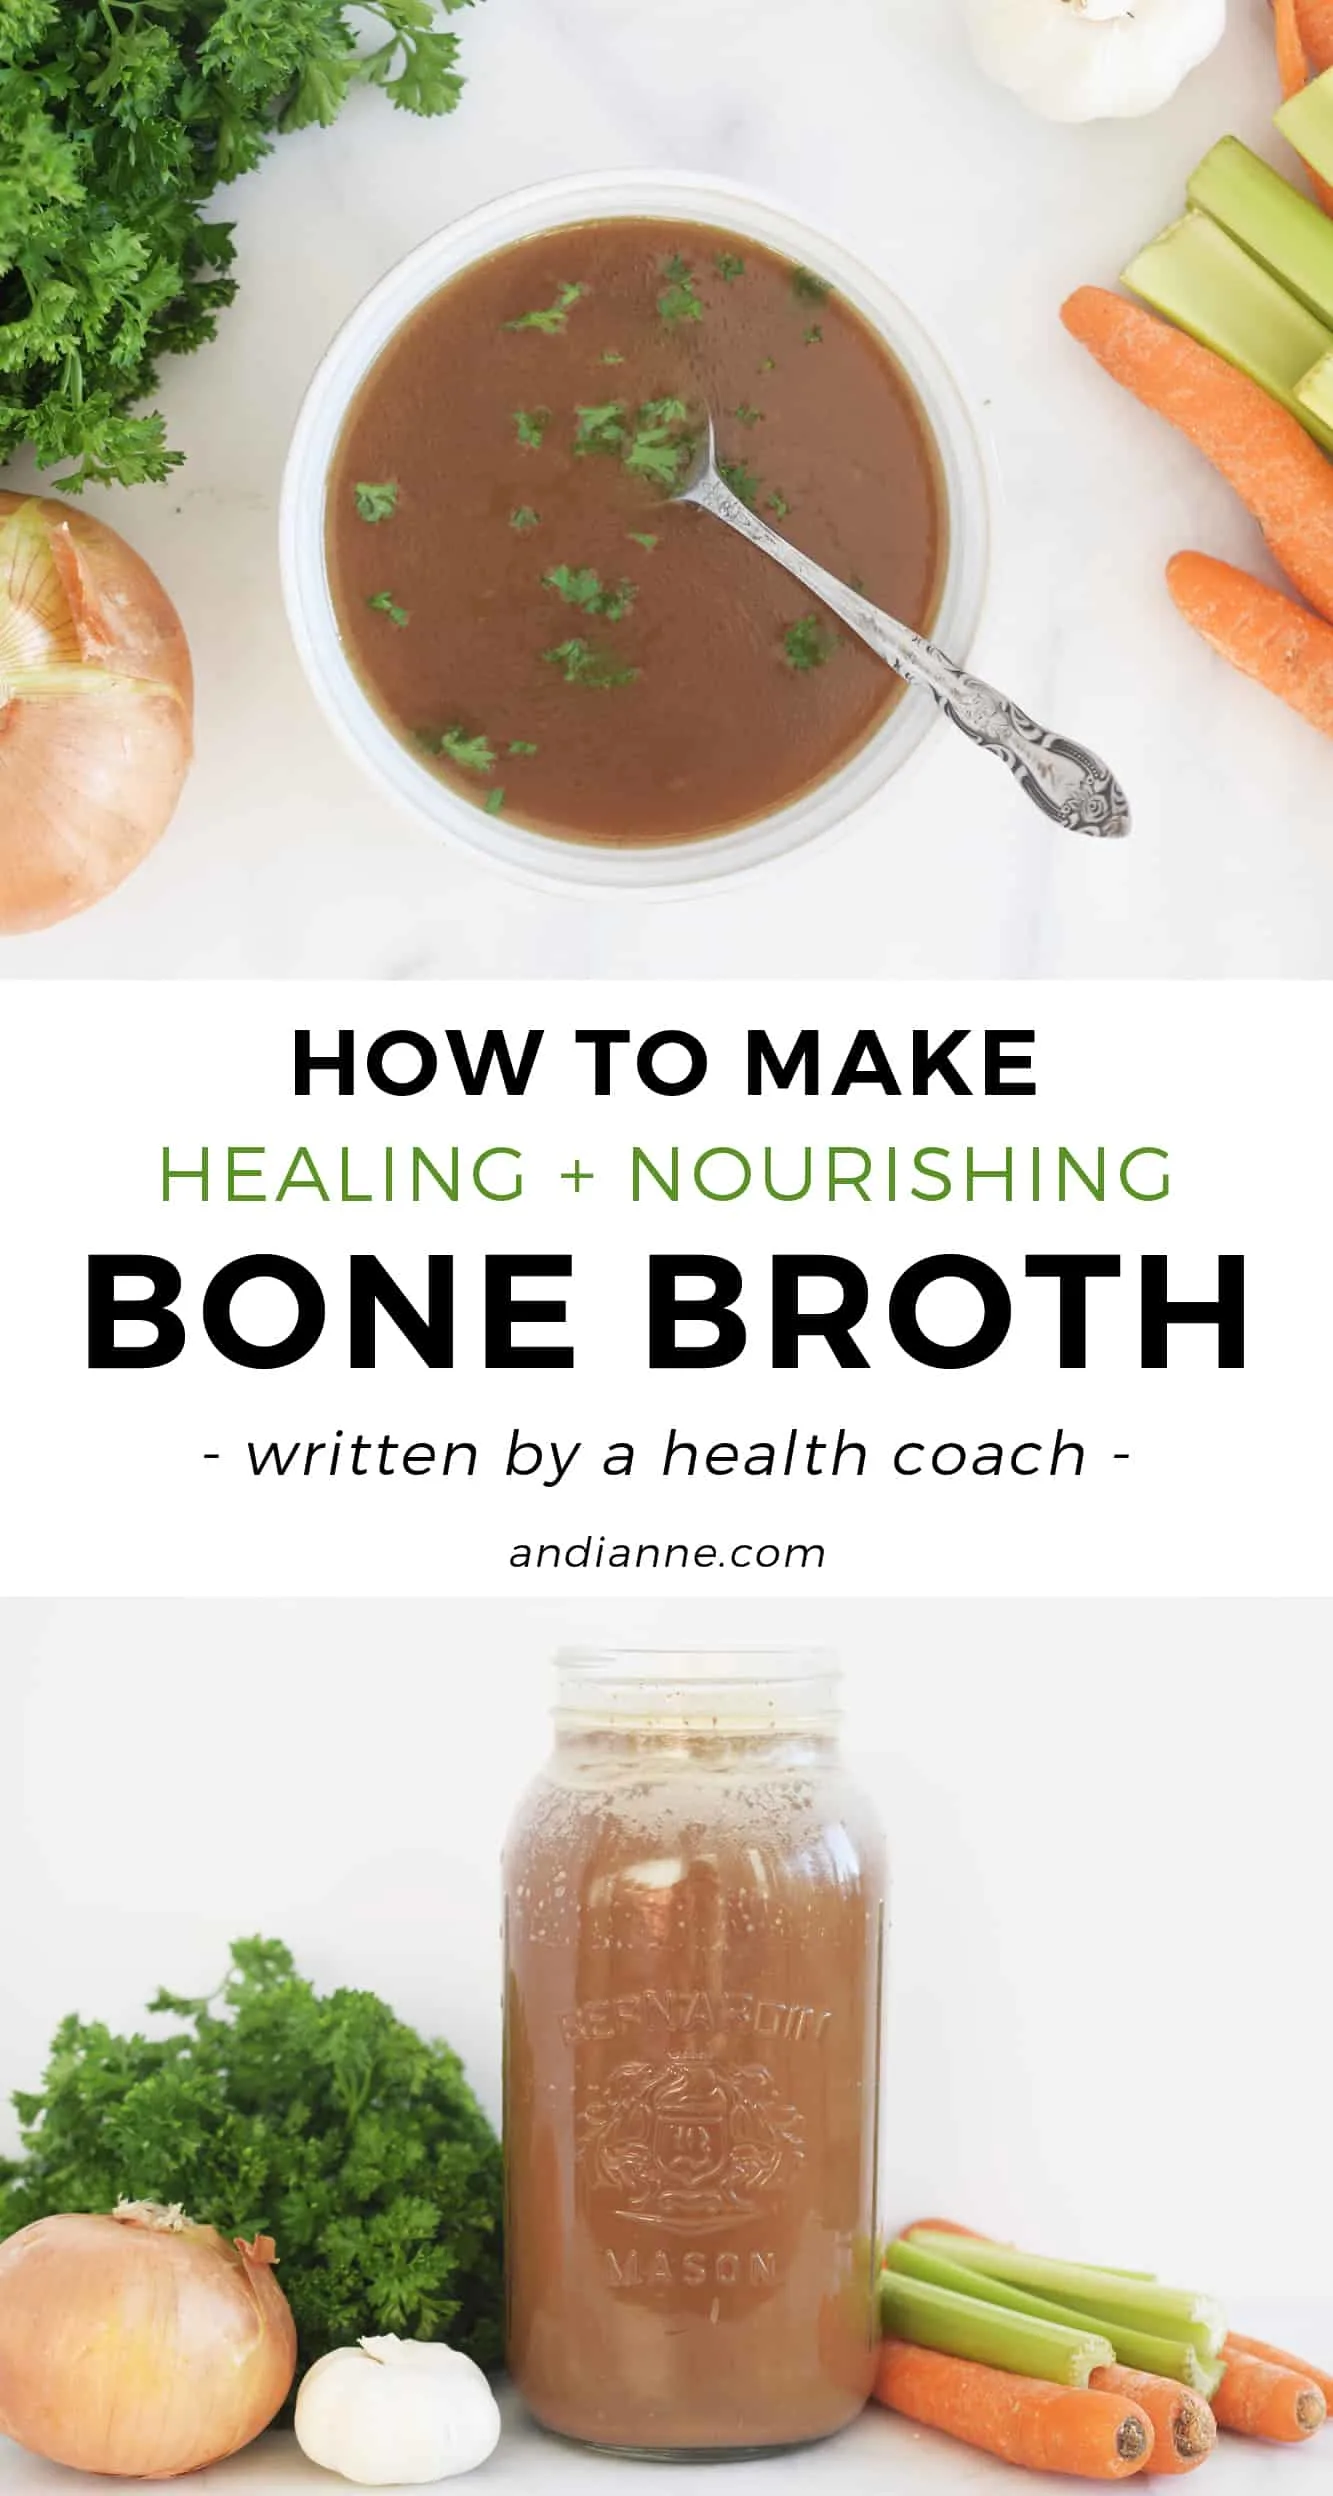
Homemade bone broth is a savory, nourishing liquid made by simmering animal bones for long periods. When you simmer in an instant pot, crockpot or on the stove, the marrow-rich bones will release gelatin and create a broth that is a high source of protein.
This recipe shares how to make bone broth in an instant pot, crockpot or on the stove. You can also use our turkey broth recipe with leftover holiday turkey bones.

Homemade Broth
In the past, making homemade bone broth was a very regular routine in our ancestors’ households. A pot of bone broth would be simmering on the stove almost daily with scraps of vegetables and leftover bones.
Back then, it was all about frugality and using everything you could. But we now know that there are some incredible benefits to making bone broth at home for you and your family, including it being a good source of protein in the form of gelatin.
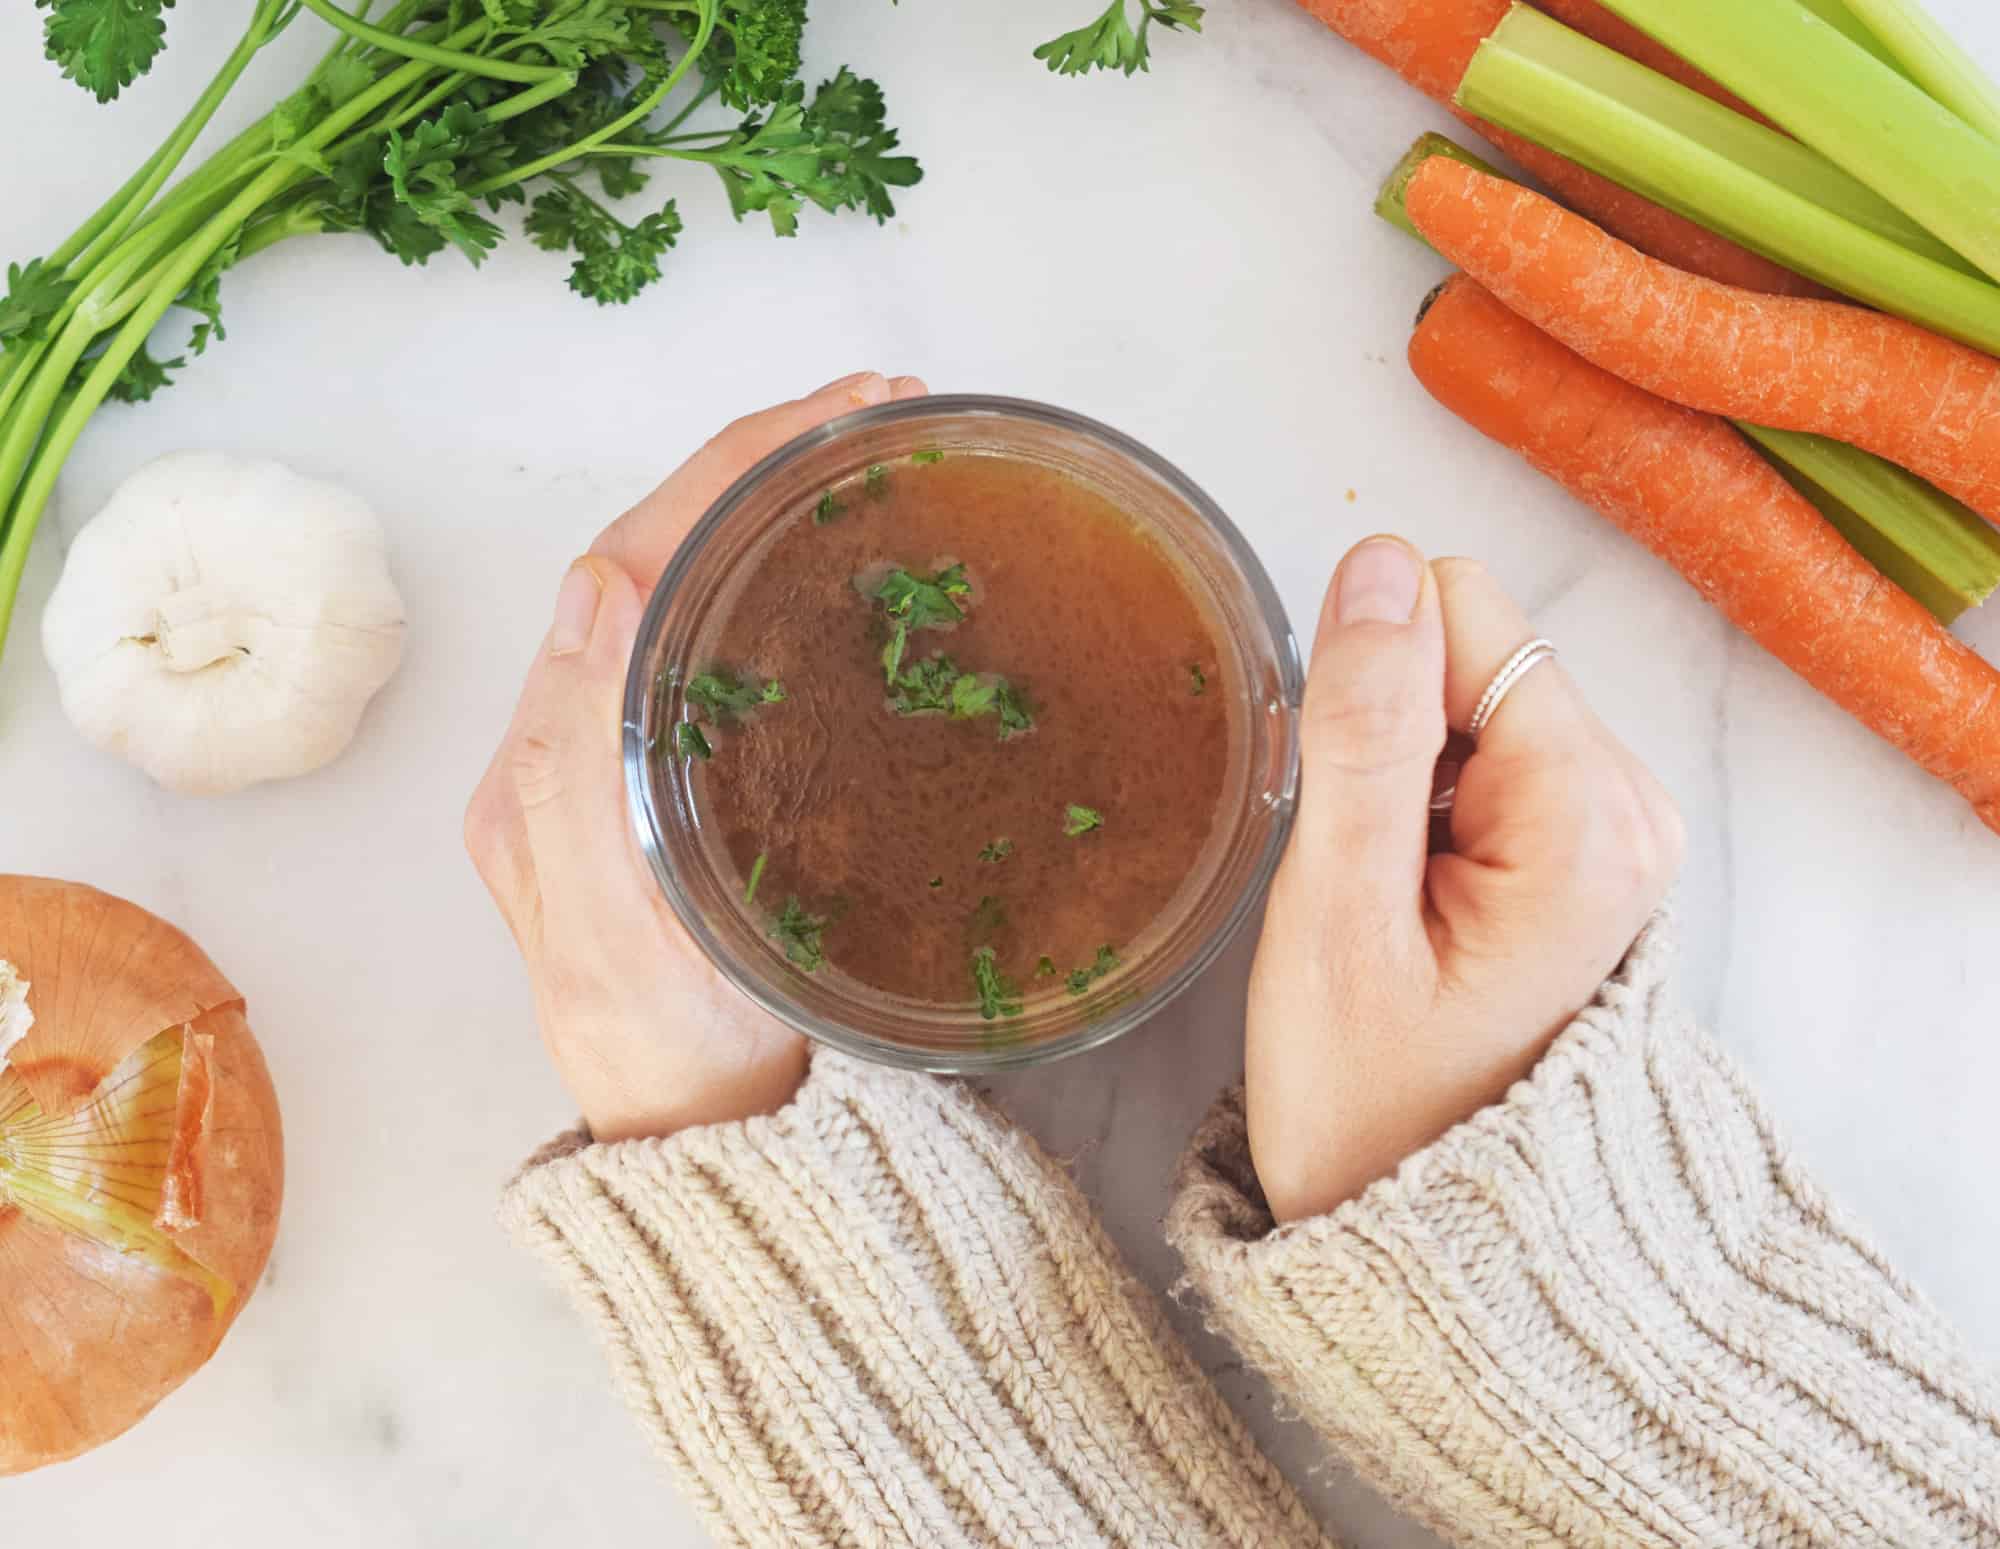
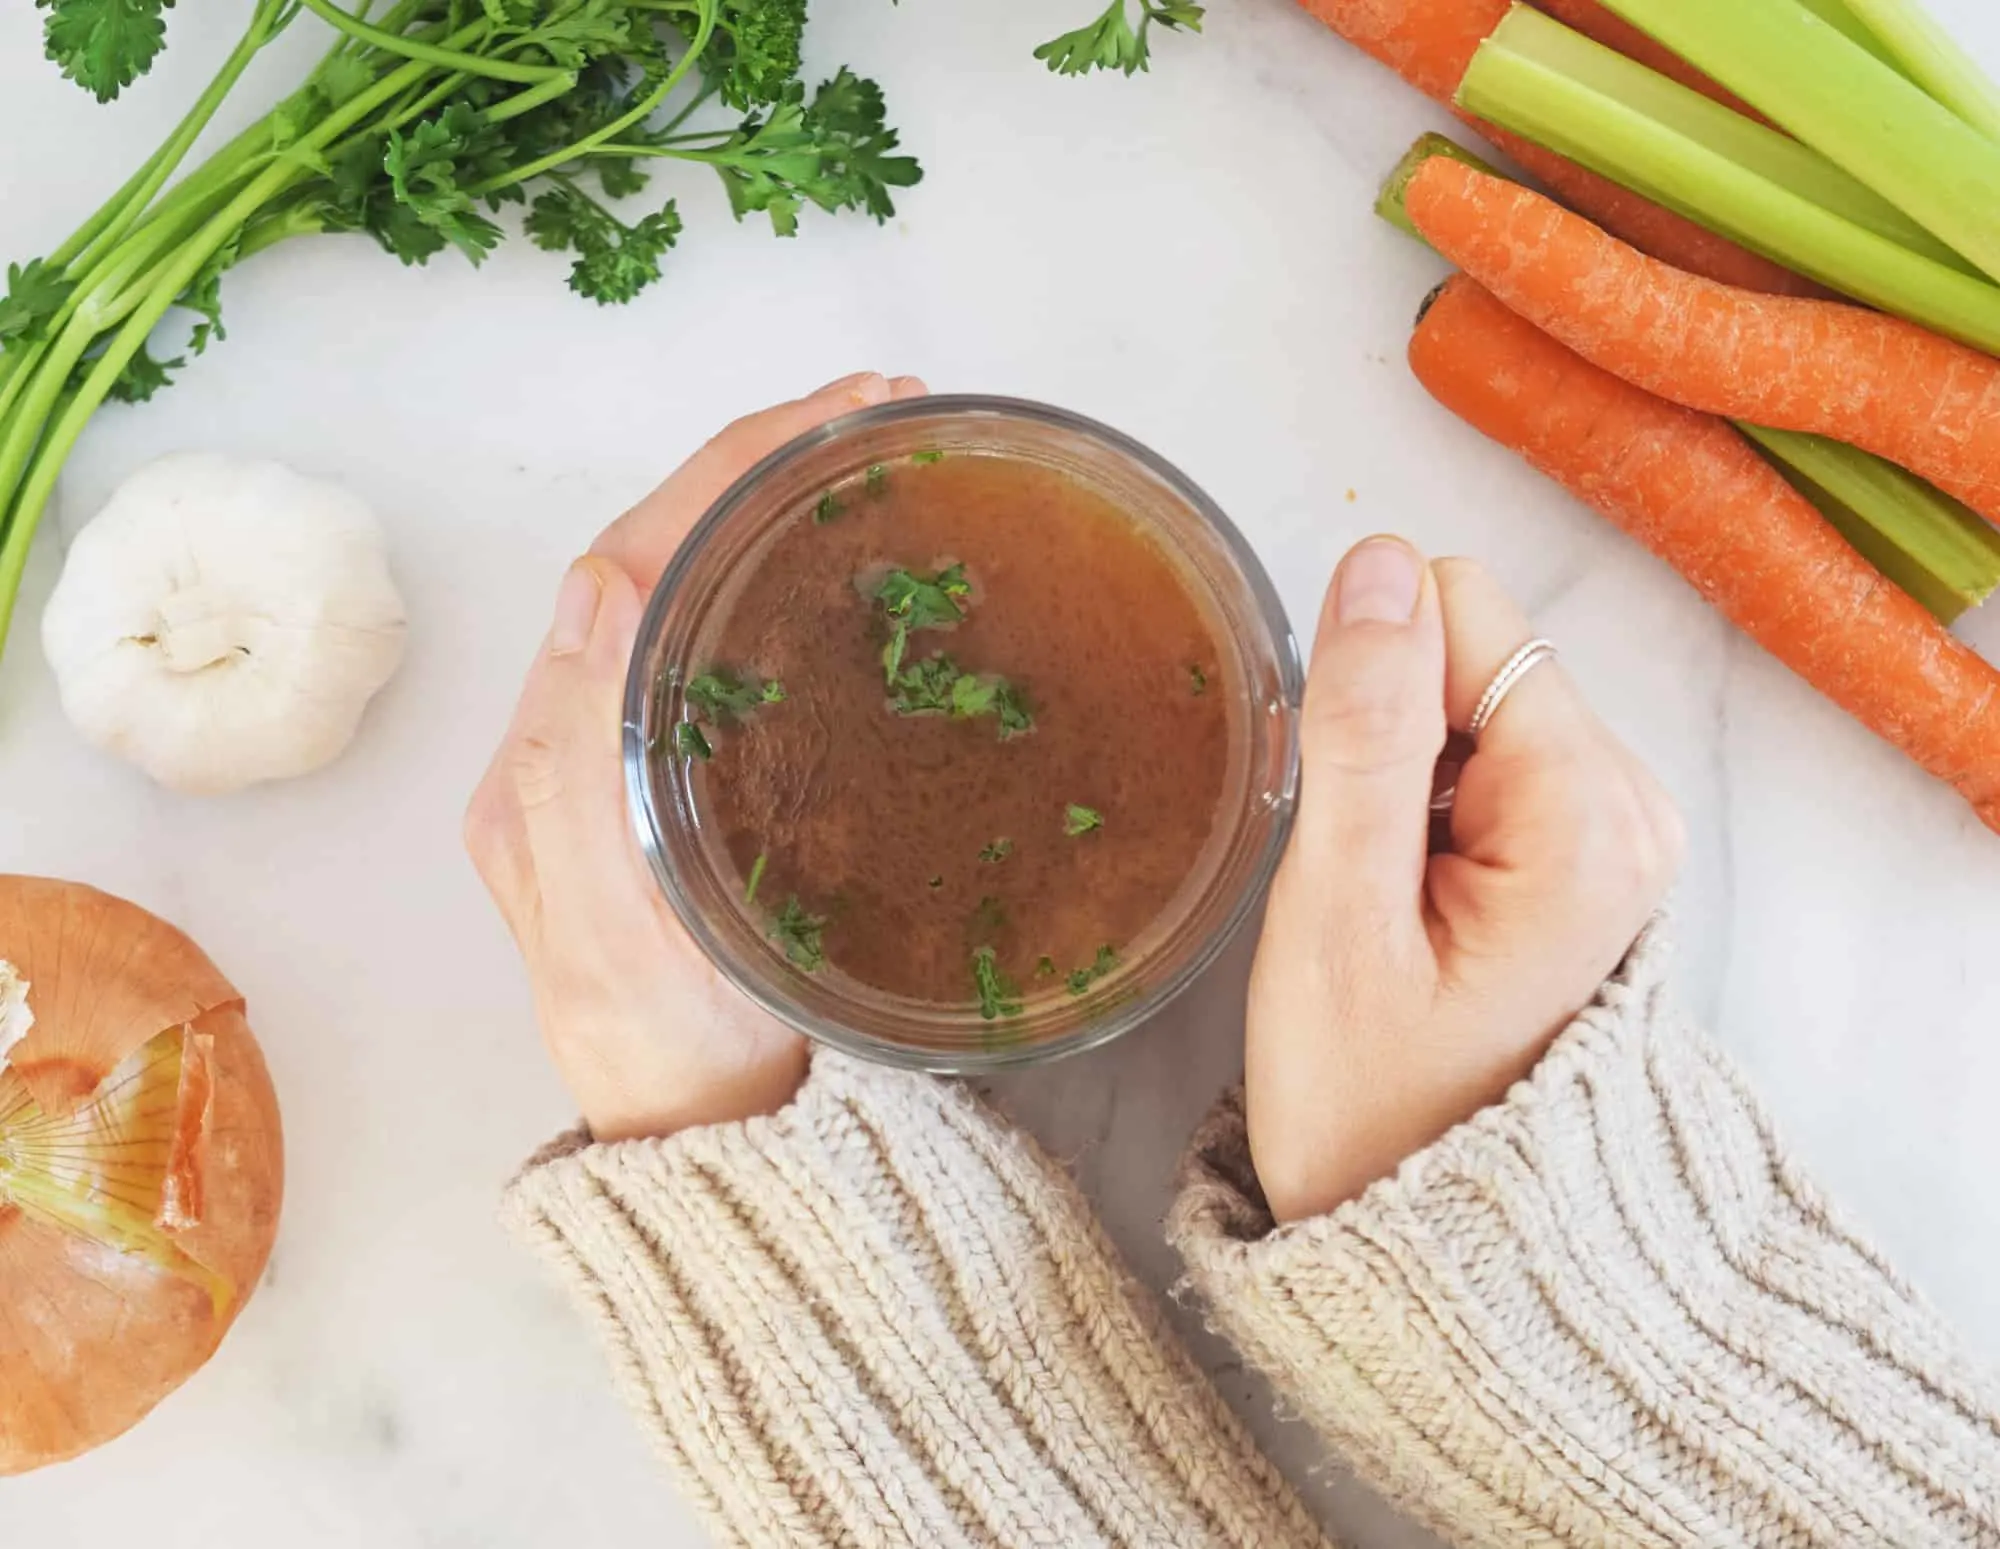
- During the winter months when the weather is chilly, I regularly have a batch of this nourishing liquid simmering in my crockpot. It’s the perfect thing to sip on for extra protein. Bone broth is comforting and soothing, and easily digestible.
- You can make chicken broth, beef broth, fish broth, turkey broth, or pork broth depending on the bones you use. These can also be mixed together.
- Bone broth has become a popular trend these days. It’s pretty common to see it in restaurants, and there are also powdered versions available at health stores. And while it’s great that these options are becoming more readily available, they are also way too expensive for what they are. You can create your bone broth at home for a fraction of the price. And it’s also surprisingly easy to make.
- This recipe can be used in your soups and stews, as flavor to your stir frys, or sipped like a tea.
- But nowadays, all thanks to the bone broth trend, you can buy pre-made bone broth at your local health food stores. You can also buy bone broth powder to add to smoothies and soups. So if you prefer to skip the process of making it yourself (or just don’t have the time that day), then this is another option.
If you’re new to bone broth and find the process a little intimidating, don’t worry I did too when I first started. But this post will share everything you need to know about making homemade bone broth yourself.


Recipe Ingredients
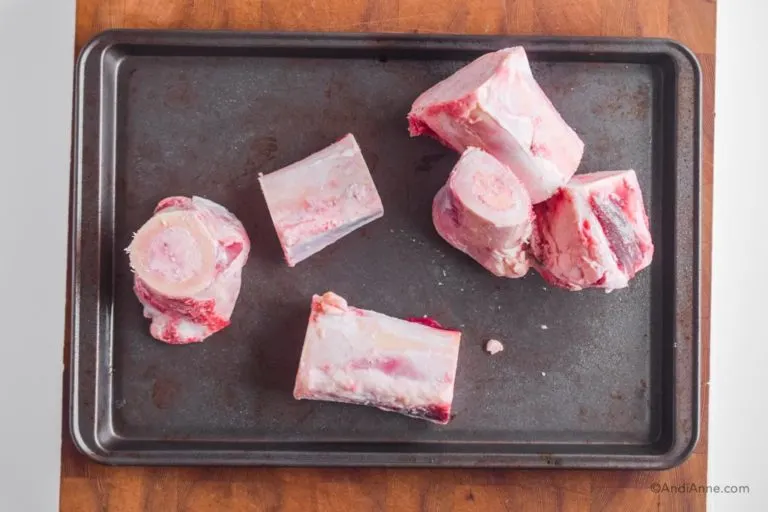
- BEST BONES: The level of nutrients found in bone broth will vary greatly due to the quality of bones that you’re using. So it’s important to select organic, grass-fed beef bones or pork bones, pasture-raised chicken bones and wild-caught fish or game bones whenever possible to get the most out of your bone broth. I go directly to a butcher or local farm and buy their beef soup bones in the frozen section. Leftover meaty bones, connective tissue, neck bones for bones from a whole chicken (can chicken feet) can also be used. Save scraps from previous dinners in the freezer until you have enough to make broth with.
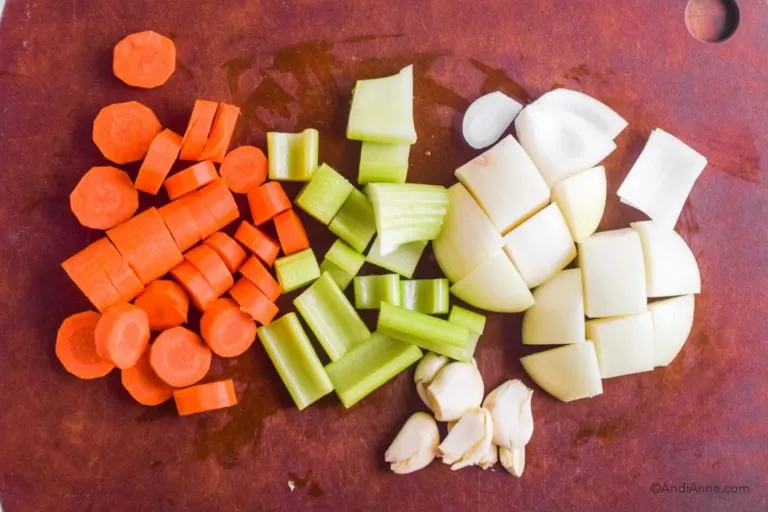
- VEGETABLES: Onion, garlic, carrots, celery, and rosemary can all be used to flavor the broth. I like to save scraps in a freezer bag over time and use these for my future broth sessions.
- SEASONING: Salt and pepper are used to season the broth.
How To Roast The Bones
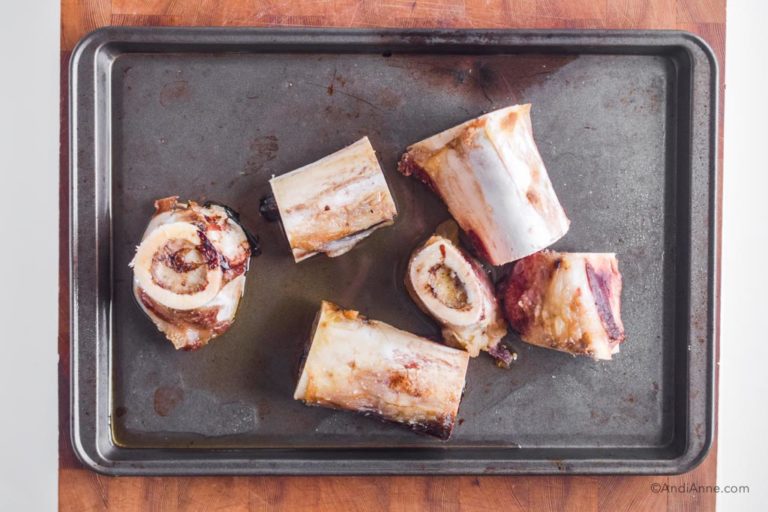
Roasted bones help to create more flavor in the broth. This first step can be applied to any of the cooking methods below.
- Preheat the oven to 350°F. Place the bones on a baking sheet.
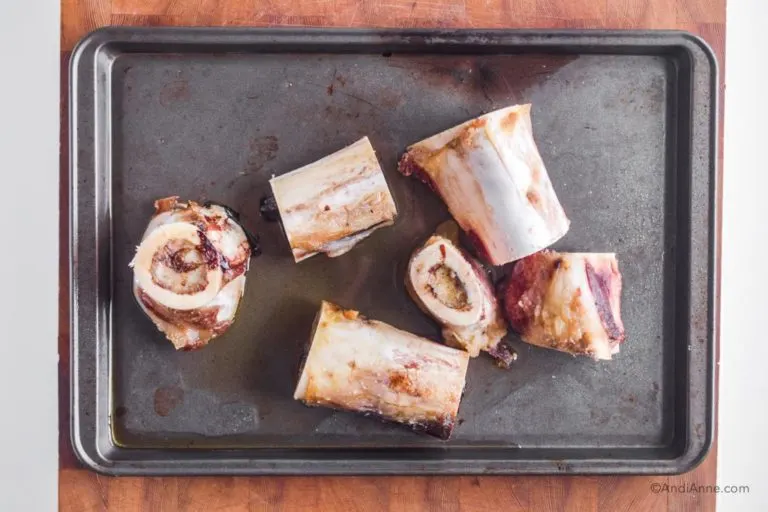
- Bake for 35-45 minutes.
- Add the bones, the cartilage and any liquid on the baking sheet to the pot for making bone broth (see instructions below).

How To Make Homemade Bone Broth
Bone broth or stock can be prepared using three different methods. Here’s a quick overview with full instructions in the recipe card below.
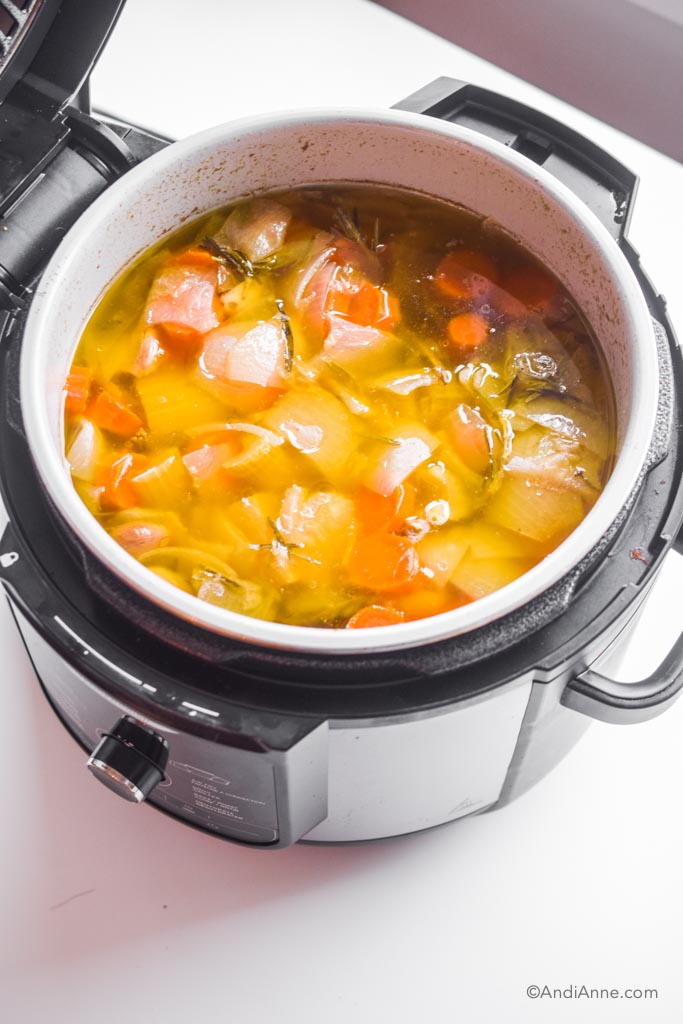
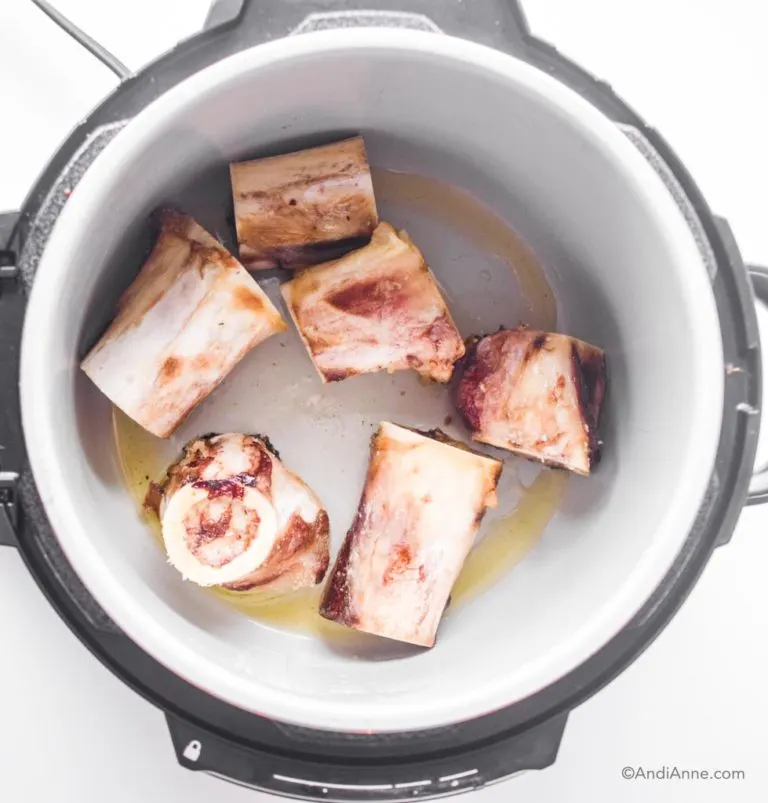
- INSTANT POT (PRESSURE COOKER): Add bones, vegetables and enough water to the pot. Close lid and set valve to seal. Cook 3 hours. Let naturally release pressure. Open the lid and strain the liquid from the solids.
- SLOW COOKER (CROCK POT): Add bones, veggies and water to the pot. Let simmer 9-24 hours. Top up with more water when needed. Strain liquids from solids through a fine mesh strainer. Letting it simmer for a long cooking time helps to release all the health benefits from the bones into the water.
- STOVETOP METHOD: Add bones and veggies to a large pot with water. Bring to a boil, then to a low simmer for 9 hours. Scoop off extra scum from the top of the soup if needed.
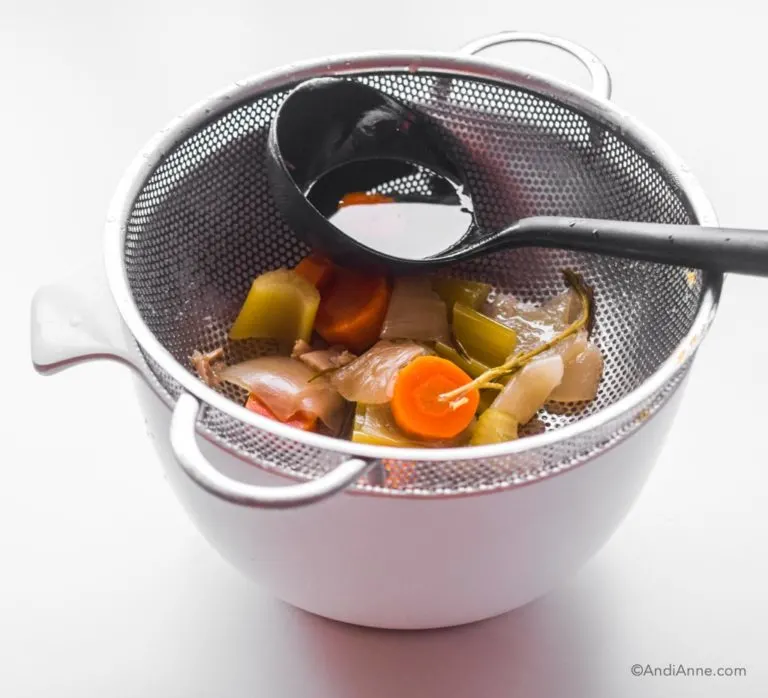
How To Strain
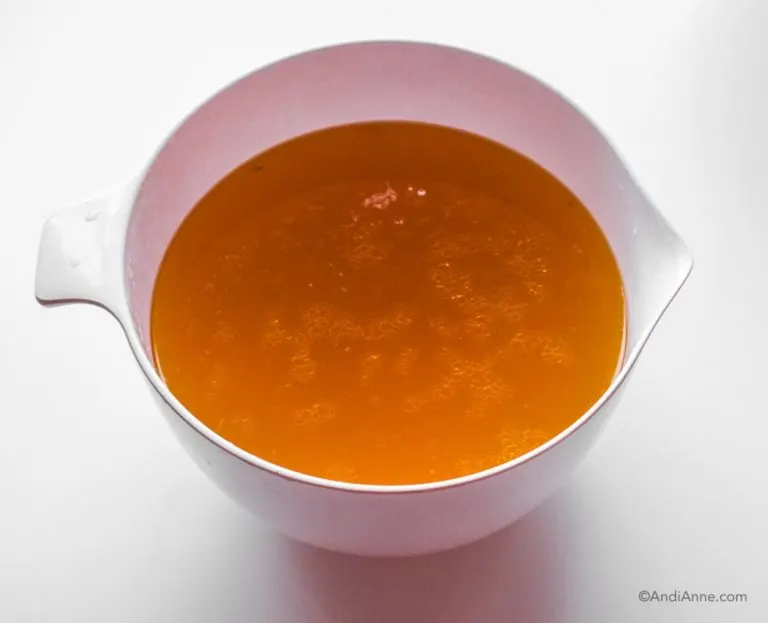
- Pour the liquid through a fine-mesh strainer into a bowl or mason jar. Bones and vegetable scraps can be discarded in the compost.
- Repeat the process until all of the liquid has been strained through a fine-mesh strainer or cheese cloth. The broth should be free from large pieces of vegetables.
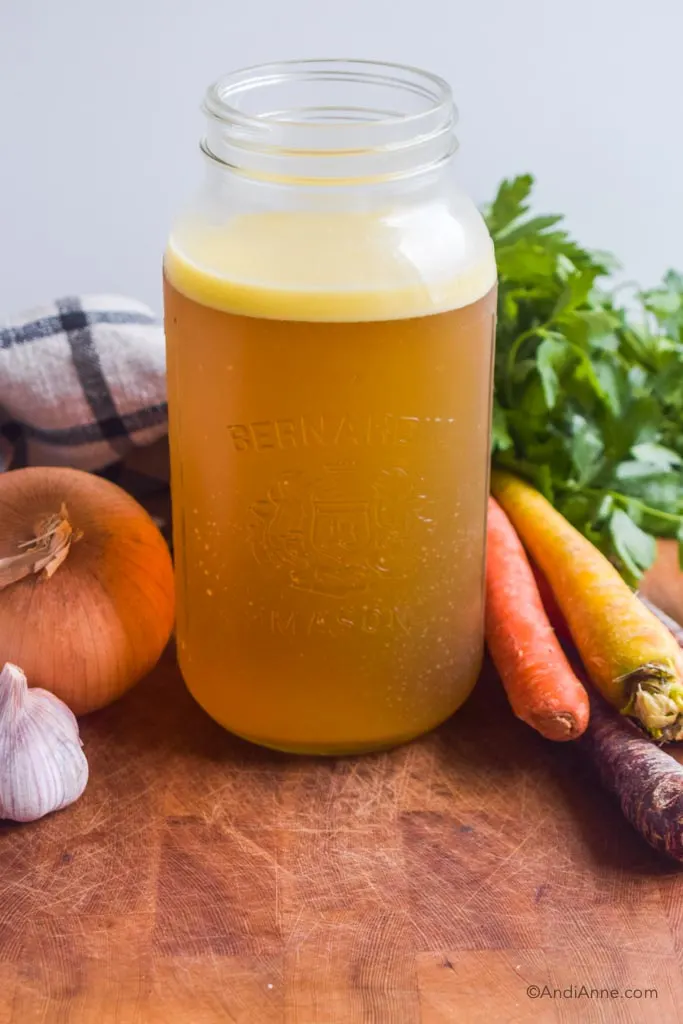
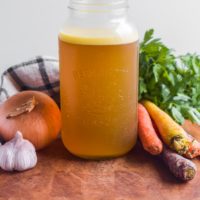
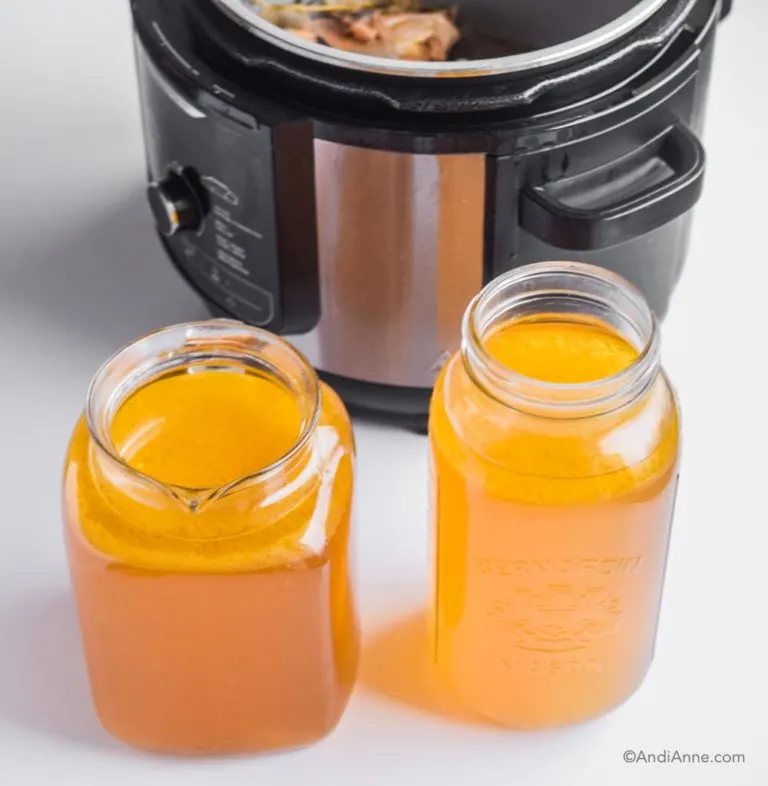
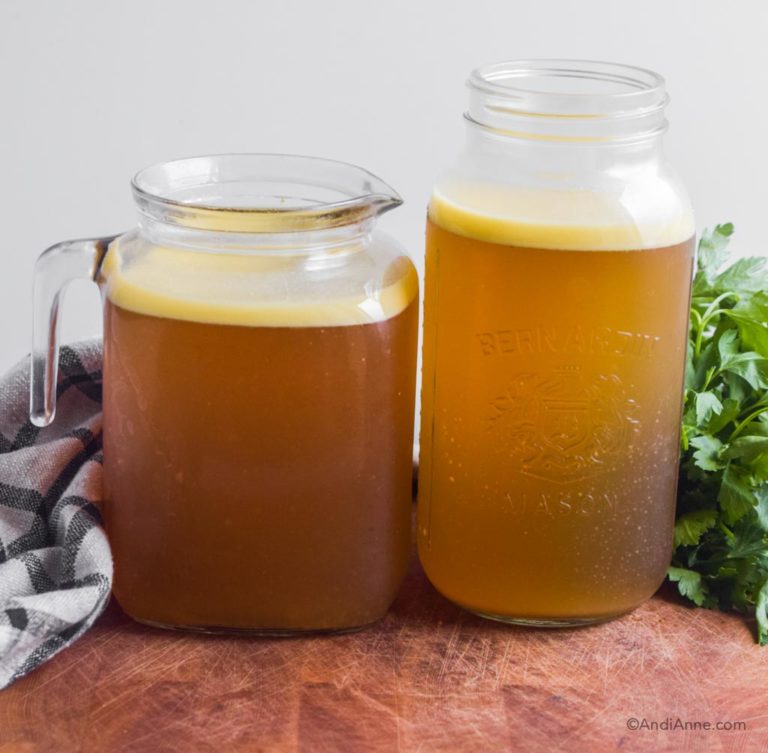
- Pour broth into large mason jars, glass jugs or glass containers, a silicone soup freezing tray or an ice cube tray for smaller portions. Let cool to room temperature before transferring to the fridge or freezer.
How To Store
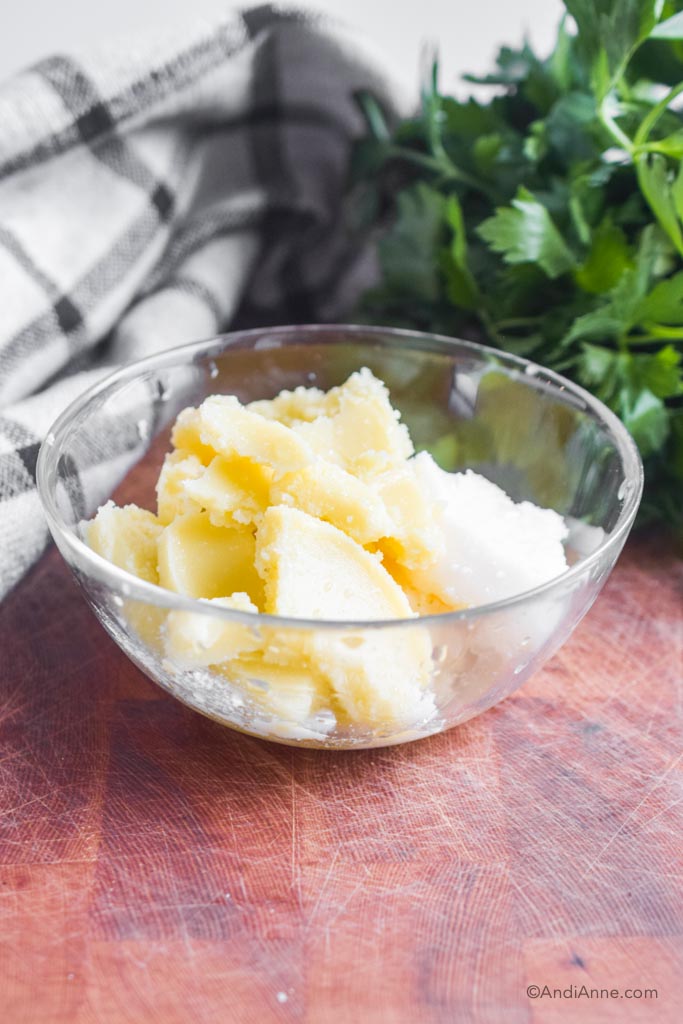
FRIDGE: Place the broth in the fridge and let it fully cool. Once the broth has cooled the fat will form at the top called tallow. Scoop this out and use as cooking oil or discard it.
FREEZER: Bone broth can be frozen in mason jars, freezer containers or bags. Many people like to pour broth into ice cube trays or silicone soup freezing trays, and then add the cubes to a freezer bag for quick and easy use in cooking.
How To Use
There are so many ways to use homemade bone broth!
- Add it to your soup recipes or beef stew.
- Cook your rice or quinoa with it for a greater depth of flavor.
- Cook mashed potatoes or sweet potatoes in broth instead of water.
- Use it to make gravy or sauces.
- Sip it as a healing drink.
For the most part, I like to treat my bone broth as a healing food. I warm it up in a pot on the stove, add a few herbs, green onions, and sea salt. I pour it into a mug and sip it the same way I would a cup of tea. I usually only drink about 1 cup of bone broth per day.
Recipe Tips
- Many people roast their bones before they make the broth to enhance the flavor. If you have the time I definitely recommend this step. It’s worth it. But if you’re busy, it’s okay to skip.
- Use a slow cooker or instant pot to make your bone broth. Bone broth is typically simmered for a minimum of 9 hours. This time can be cut down to 3 hours if you use your instant pot. Some people use a pot on the stove, but I would much rather set it and forget it.
- Spoon off any scum or foam that rises to the top. Depending on the bones you use, you’ll get some scum rising to the surface as your broth simmers. This is normal and it isn’t bad for you to eat. But if it grosses you out, just scoop it off with a soup spoon.
- Add garlic and onion at the beginning of your simmering. Adding vegetables can enhance the flavor in your bone broth. They’ll also change the fragrance as it’s cooking – simmering just the bones creates a smell that I’m not a fan of. You’ll want to add the heartier vegetables, like garlic, onion, and carrots, at the beginning.
- Add leafy herbs like parsley in the last few minutes. Fresh herbs are more fragile and the flavors will break down faster, so add these ingredients at the very end and let sit for 10 minutes. Heartier herbs like rosemary and thyme can be added in the beginning.
- Strain your broth into glass jars using a fine mesh strainer. This is my least favorite part, but it’s worth it to get that nourishing bone broth afterward. Using a soup ladle, pour your broth into a bowl or jar through a fine-mesh strainer. The strainer will catch all the large pieces that you don’t want. This will help keep your broth as clear as possible. You can discard the leftover bones and vegetables in the compost bin.
- Let your broth sit in the fridge to allow fat to float to the top and coagulate. When you let the broth fully cool in the fridge, a layer of fat will form at the top – this is called tallow and was traditionally used as a cooking oil. I just use a spoon to break through it and scoop it into a jar. I save it for when I’m cooking in the frying pan (like stir-fry veggies, eggs, etc) or you can discard it. Tallow is an excellent healthy fat source and it’s a great way to cut down on the cost of using cooking oils.
- Repeat The Process. If you have good soup bones that still have some marrow on them, you can make another batch using them. Just add all the bones back to the instant pot (no need to use fresh ones) and fill with water to the max line and repeat the steps to cook. This created another full batch of broth for me that was a slightly lighter color.


Go for the best quality organic bones from animals that are grass-fed, pasture-raised or wild-caught beef, chicken, pork or fish bones. This is because you want to reap the most nutritional benefits from the bones as possible.
You can purchase bones from organic grocery stores or local farmers’ markets that are labeled “soup bones” or “for bone broth”. Check the freezer section for bags of bones, or ask a local butcher.
You can also save the bones from good quality meat that you’ve been eating – just store them in a freezer bag until you have a good amount to get started with.
In the last 100 years, food companies started to create store-bought versions to help consumers save time in the kitchen. And while they did this, they stopped using actual animal bones and started using processed ingredients instead.
The store-bought cartons of chicken stock, beef broth or vegetable broth are loaded with preservatives and artificial ingredients that can be high in sodium. These are nothing like the homemade version. However, it is definitely much cheaper to make it yourself!
To tell the difference between the good quality store-bought bone broth and the poor quality, just read the ingredients label.


Homemade Bone Broth Recipe
Ingredients
- 1 lb beef soup bones
- 1 onion - quartered
- 4 garlic cloves - mashed
- 2 carrots - peeled and chopped
- 2 celery stalks - chopped
- 3 rosemary sprigs - or thyme sprigs
- Salt and pepper - to taste
Instructions
- Preheat the oven to 350°F. Place the bones on a baking sheet.
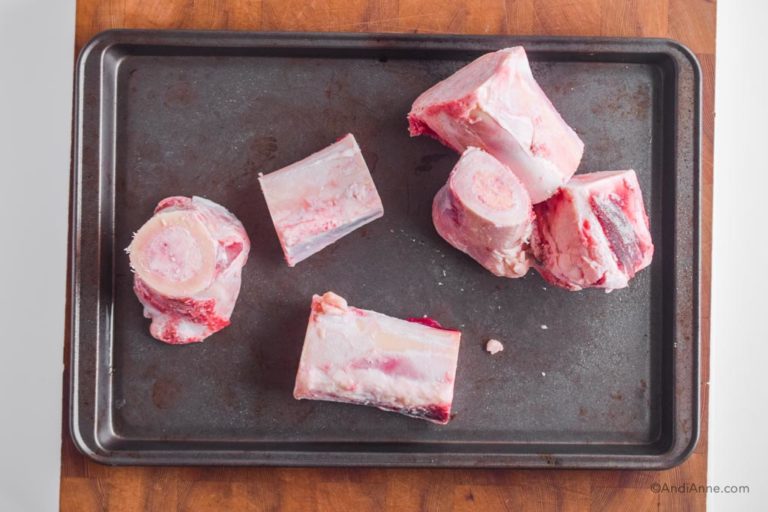
- Bake for 35-45 minutes.
- Add the bones to the bottom of the instant pot along with any grease or extra pieces that came out of them.

- Chop up the vegetables and mash the garlic.

- Add all vegetables to instant pot. Fill to the max line with water.

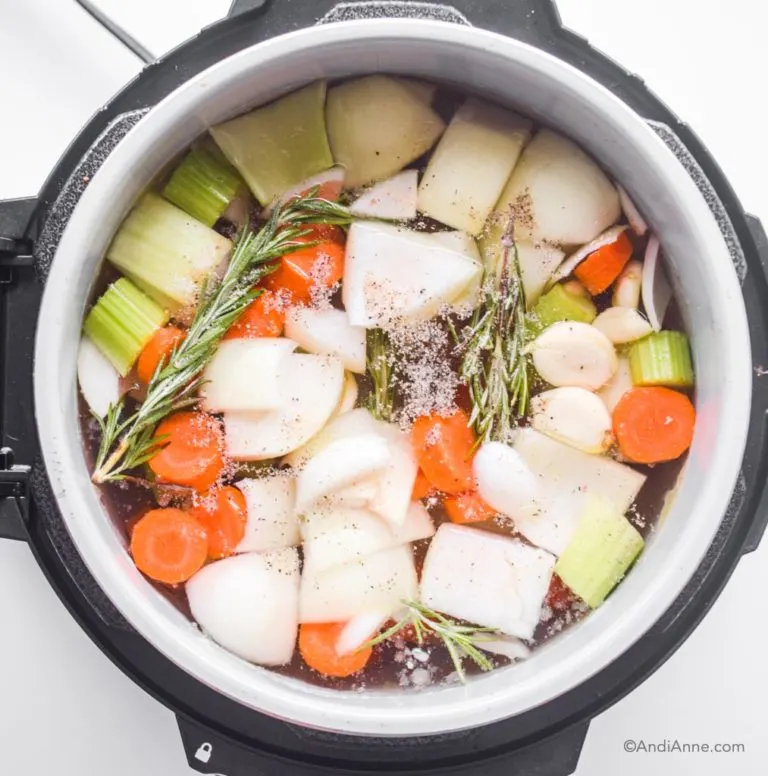
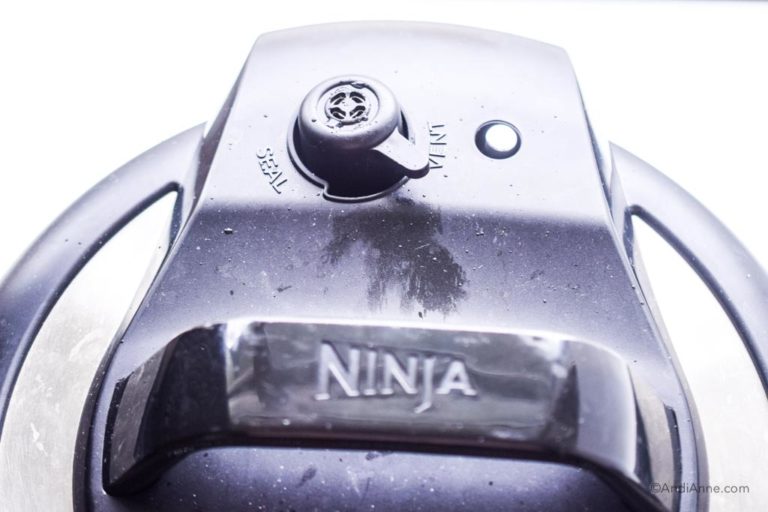
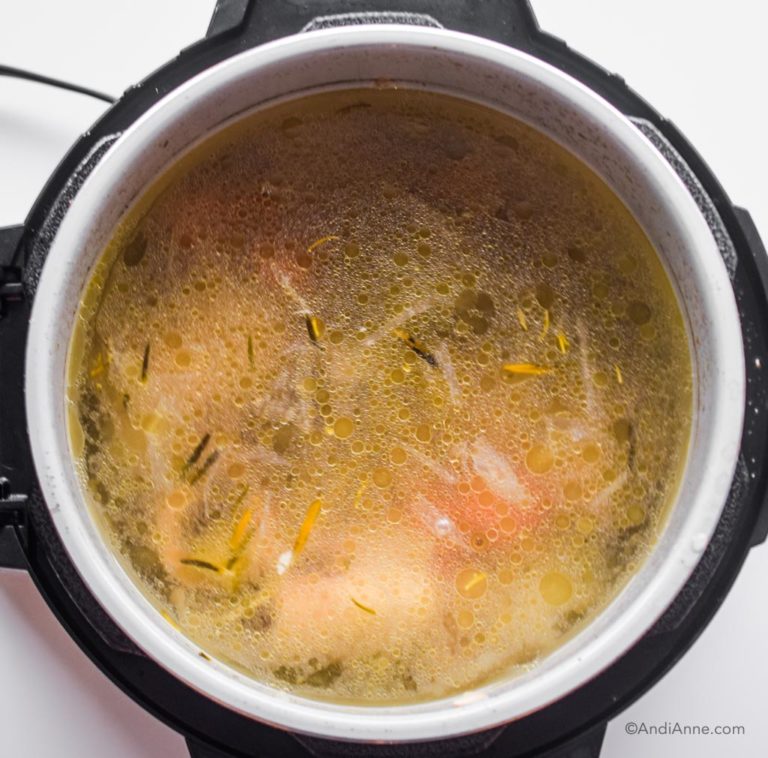
- Close the lid and turn the steam release valve to "seal". Set the instant pot to low and 180 minutes (3 hours).The instant pot will take some time to fully pressurize before it starts cooking (mine took about 30 minutes). When the cooking time is complete, let it naturally release the pressure for 10-15 minutes. Once that's complete, carefully turn the steam valve to "vent" position (I usually do this with a wooden spoon so that my hand is far away from the steam). Once all steam has released, open the lid.

- The broth will be a golden yellow color and the vegetables will be quite mushy.


- Use a strainer, soup ladle and large bowl: Pour the soup through the strainer into a large bowl. Transfer the extra vegetables and bones to another bowl when they pile too high.
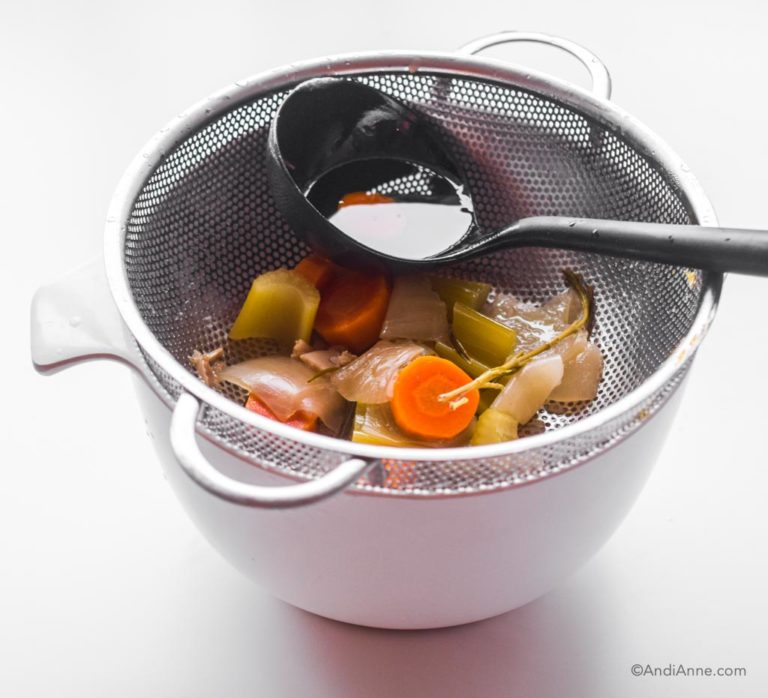
- Repeat the process until all of the liquid has been strained through a fine mesh strainer.
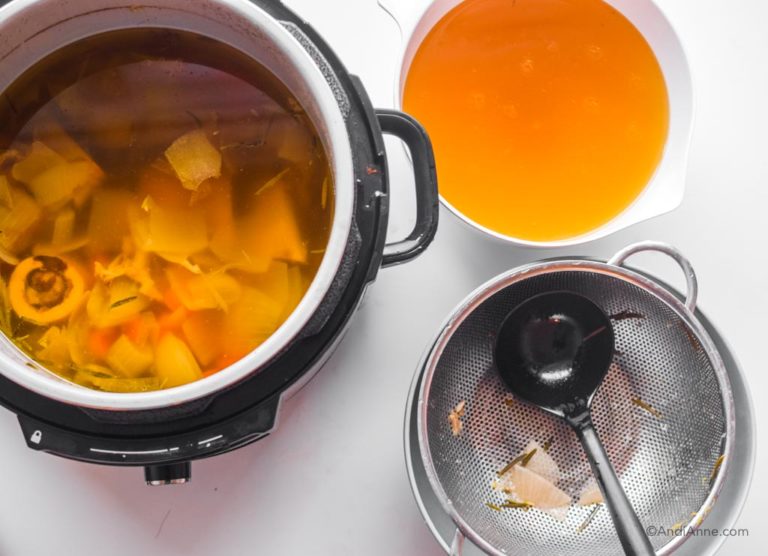

- The broth should be free from large pieces of vegetables.

- Pour into mason jars or glass jugs and let those sit for 1 hour before transfering to the fridge.Note: Do not drink the broth yet – it will be really "oily" at this stage. You must let it chill in the fridge for tallow to separate.

- If you have good soup bones that still have some marrow on them, you can repeat the process! Just add all the vegetables and bones back to the instant pot (no need to make more) and fill with water to the max line. Repeat the steps to cook from above.This created another full batch of broth for me that was slightly different in color.

- As the broth chills in the fridge it will create a hard top layer. This is the tallow. You can use a spoon to break through it.

- The tallow can be stored in a bowl and used as a cooking oil – add it to anything you cook in a frying pan – eggs, vegetables, meat, etc. This can be stored in an airtight container in the fridge or on the counter.
- Storage Instructions: Fridge – Bone broth can be stored in the fridge for 1-2 weeks.Freezer – Bone broth can be frozen in mason jars or freezer bags. Many people like to pour broth into ice cube trays to freeze, and then add the cubes to a freezer bag for quick and easy use in cooking.


Recipe Notes:
- My favorite way to use bone broth: Pour into a small pot and let simmer until heated through. Feel free to season with salt and pepper, spices, fresh herbs, and chopped green onions. Pour into a bowl or mug and sip like you would a cup of tea.
- Other ways to use bone broth: Use as a base for soups, stews, and sauces. Add it as the liquid to cook your whole grains and mashed potatoes for a greater depth of flavor.
How To Cook In A Slow Cooker
- Add the bones and vegetables to the slow cooker. Fill the slow cooker with water about 2 inches from the top.
- Turn slow cooker on low and let simmer for a minimum of 9 hours or more. I usually simmer mine for 24-36 hours. Top the slow cooker with more water as needed.
How To Cook On The Stove
- Add the bones and vegetables to a large stockpot. Fill the pot 3/4 full with water. Bring to a boil then reduce heat to let simmer for about 9 hours.
- Add more water through the process if necessary. Scoop off extra scum from the top if needed.
Nutrition
The nutritional information provided is an estimate and is per serving.